As an image editor for over 10 years, I came across a lot of techniques for isolating objects. But what, if you have an image of something already isolated on white?
Here, I will guide you through one of the easiest ways to remove white copy space from a JPG – so you can use these images with transparency in your composition in Adobe Photoshop (or possibly other editing software). It’s straight forward, easy and I will break it down into just a few key steps.
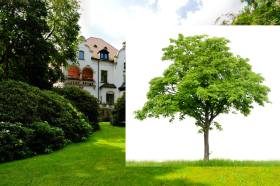
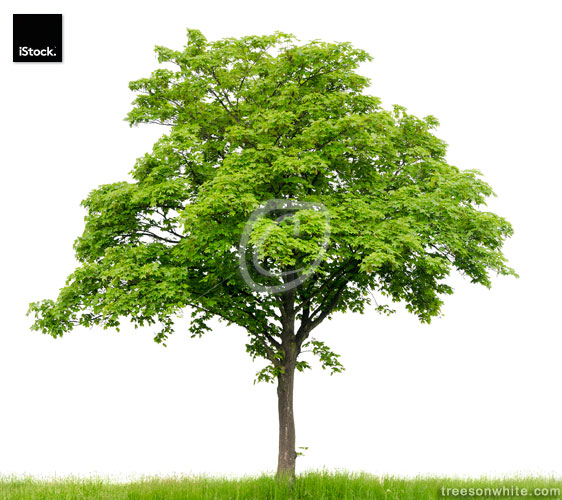
We’ll start with an image of somthing already isolated on white. If you bought the following photo on Istockphoto.com, you have a flat JPG with both the Tree and the White Background flattened:
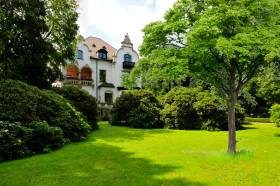
This is my example scene where I would like to insert my isolated tree:

Open it up in Photoshop and insert it into your composition.

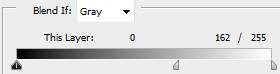
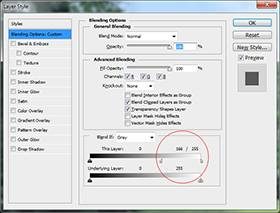
Double-click the layer containing the tree. It’ll open with “Blending Options”. Now, hold down ALT an click the left part of the little handle on the right side of the bar labeled “This Layer:” Drag it, until the white disappears. How far you’ll have to drag depends on the background image as well as the way your object on white was isolated:


You can use the Dodge and Burn Tool to adjust shadows/highlights to match your composition scene. This is how the final image looks:

Also, you can Save For Web.. as a PNG with transparency to use the image on a webpage (see the transparent tree example on the right side of my “About” or “Blog” page).
There are other techniques, but I found this one very helpful when there’s no time or no need for advanced isolating.
Please use the comment function if you have any questions or would like to add something.
Thanks for reading,
Alex